From Black & White to Vivid Life: Expert-Level Photo Restoration Workflow Revealed
Unlock stunning historical photo restorations with AI! Discover a powerful workflow that combines AI colorization, HD upscaling, and damage repair, utilizing cutting-edge technologies like majicMIX and ControlNet. Learn how to bring old photos to life and explore the key components, critical parameters, and architecture behind this innovative process.
- Use Case
- Restoration
- Best For
- Restoration
- Models
- Controlnet
- Key Nodes
- ControlnetUpscaler
- VRAM
- Low VRAM (≤8GB)
- Reading Time
- 3 min
Workflow Overview
Unlock stunning historical photo restorations with AI! Discover a powerful workflow that combines AI colorization, HD upscaling, and damage repair, utilizing cutting-edge technologies like majicMIX and ControlNet. Learn how to bring old photos to life and explore the key components, critical parameters, and architecture behind this innovative process.
Content type: Workflow
Primary intent: Download
Required Models
- Controlnet
Required Nodes
- Controlnet
- Upscaler
Setup Notes
- Install the required models before opening the workflow template.
- Recommended hardware: Low VRAM (≤8GB).
1. Workflow Overview
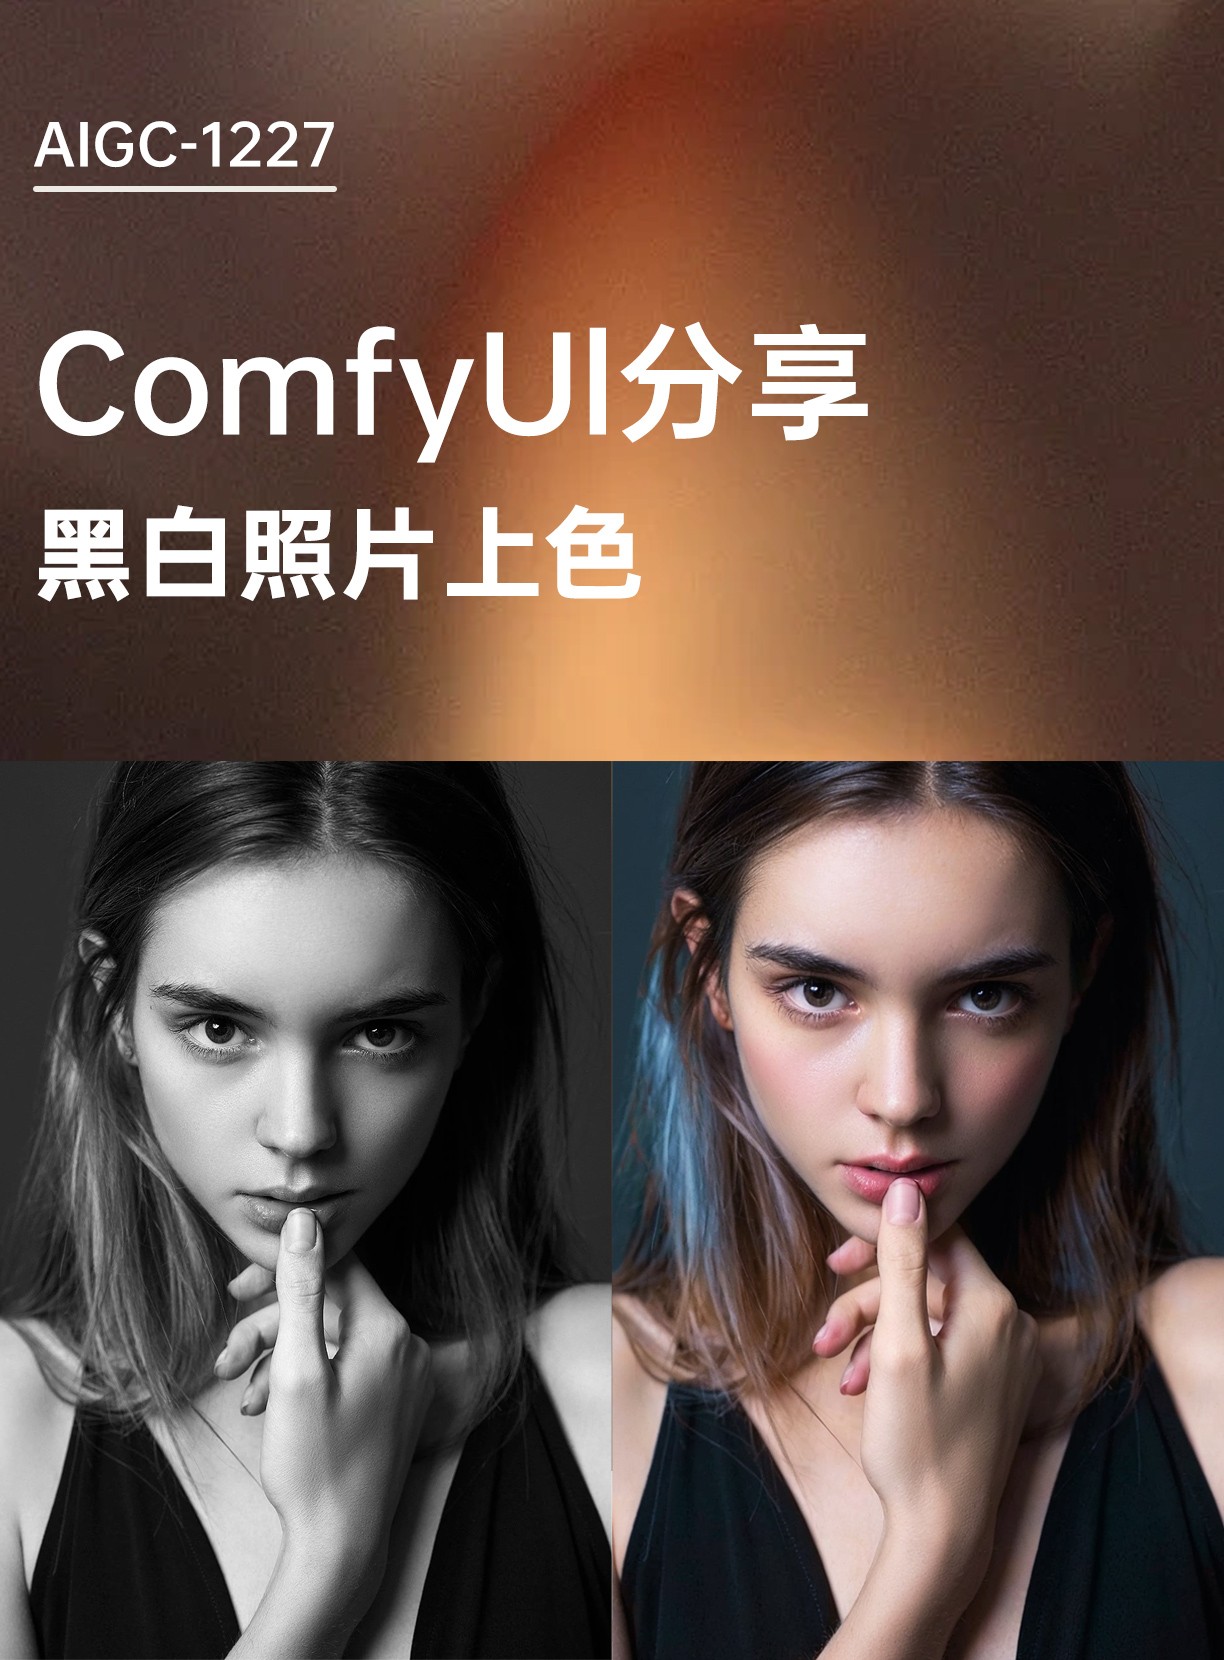
This workflow specializes in historical photo restoration with:
AI Colorization: Convert B&W to natural colors
HD Upscaling: 1.5x resolution boost (4K capable)
Damage Repair: Auto-fix scratches/folds/facial flaws
Core Technologies:
majicMIX realistic v7: Photorealistic portrait modelioclab_sd15_recolorControlNet: Colorization-optimizedBNK_CLIPTextEncodeAdvanced: Enhanced prompt encoding
2. Key Components
Component | Functionality | Installation |
|---|---|---|
majicMIX realistic | Specializes in skin texture & natural tones | Manual download from CivitAI |
ioclab_sd15_recolor | ControlNet model for colorization | Place in |
ImageScaleBy |
| Built-in node |
3. Critical Parameters
Color Control:(Python)
"ControlNetApplyAdvanced": [1, 0, 1] # strength=1.0 (full process)Negative Prompt:(Python)
"paintings,((monochrome)),((grayscale))..." # force color outputSampler:(Python)
"KSampler": ["dpmpp_2m", "karras", 30 steps, CFG=5]
4. Workflow Architecture

graph LR
  A[Input B&W Photo] --> B[1.5x Upscale]
  B --> C[ControlNet Colorize]
  C --> D[VAE Decode]
D --> E[Comparison Output]Preprocessing:
Upscale with
nearest-exactalgorithmPreserve composition via
VAEEncode
Colorization:
Dual prompts:
Positive: "8k wallpaper, best quality"
Negative: "monochrome, grayscale"
Output:
Side-by-side comparison with
Image Comparer
5. I/O Specifications
Input Requirements:
Format: JPG/PNG (600+ DPI recommended)
Resolution: Min 600x800px
Content: Front-facing portraits work best
Outputs:
Resolution: Original x1.5 (e.g. 1000x1498→1500x2247)
Format: PNG (lossless)
Metadata included (view via
PNGInfo)
6. Pro Tips
Hardware:
≥8GB VRAM (for 1500x2247 processing)
Enable
--xformers
Troubleshooting:
Over-saturation: Reduce ControlNet strength (1.0→0.8)
Face distortion: Add "bad anatomy" to negatives
Artifacts: Manual PS repair before reprocessing
Advanced:(Python)
# More vibrant colors:
Add "(vivid colors:1.3)" to positive
# Partial B&W effect:
Set ControlNet end=0.8 (default 1.0)